WordPress is a powerful content management system(cms).This cms can be used to create a blog, ecommerce store, portfolio website or any other type of website.In this guide we will learn step by step how to install it locally on your personal computer.If you install it locally you can learn how to create plugins and create themes.You can learn how to use dashboards and you can also test it how effective it is.But before we progress we need to know why people are using wordpress so extensively.
WordPress has below few features which make it popular among developers and users:
1.User friendly interface :Wordpress provides intuitive dasshboard.If users has less technical knowledge then also they can manage their content with ease.
2.Flexible and customizable : WordPress can be eaasily customized because it has number of plugins and themes available which can be used to modify the core functionality.
3.Responsive :Available themes provide responsive design which get fit to all devices making UX experience great.
4.Community support : WordPress has many developers and users.Users and developers can easily connect to forums,tutorials and documentation to find a solution for any issue.
5.Security : Lots of plugins available which can be used to secure your website .
6.Ecommerce capability : Provides a plugin Woocommerce which can be used for setting ecommerce store for you.
7.Regular Updates :Regular updates for patches ,security and changes are released providing an access to latest features and functionality.
Now you are familiar with what wordpress is and why we need it.So let’s learn now to install it locally.
Prerequisites
- Basic knowledge of PHP and Mysql
2. XAMPP installed locally
Step 1: Start xampp locally
XAMPP is a free open source package of software which basically bundles PHP, Mysql ,Apache server and Perl together to create a local server environment for development.
To install wordpress locally first we need to start xampp locally.
To start xampp locally we need to navigate to local folder where your xampp is installed .My xampp installation is inside C drive.Navigate inside C:\xampp and you can see xampp_start .Click on xampp_start .This will start your xampp locally.
See the screen shot below:

Step 2: Create a database for wordpress
The next thing we need to do is to create a database where the wordpress will add the tables during the installation process.
Navigate to http://localhost/phpmyadmin/ in your browser
You will get to see the blow screen for phpmyadmin.From here you can manage databases for your local applications and websites.See the below screen.

Now here click on Databases tab .Enter database name as wordpress_stage_installation and click on create button .This database is required during the process of wordpress installation.
See the screenshot below

Database wordpress_stage_installation has been created now.
Step 3: Download and extract wordpress
Now we need to download wordpress.For this we need to go to wordpress site’s download page https://wordpress.org/download/
Click on download button and you will get the wordpress downloaded in your downloads folder in PC.
You will get the zip format for this wordpress software.
Extract the zip folder and you will get a folder named as wordpress.
Navigate to xampp installation directory which is usually C:/xampp/htdocs and paste the folder there.
You can rename the folder .I have renamed it as phpgurublog .
See the screenshot below:

Step 4: Configure wordpress
To configure wordpress we need to go to first this url In your browser http://localhost/phpgurublog and go through some steps .
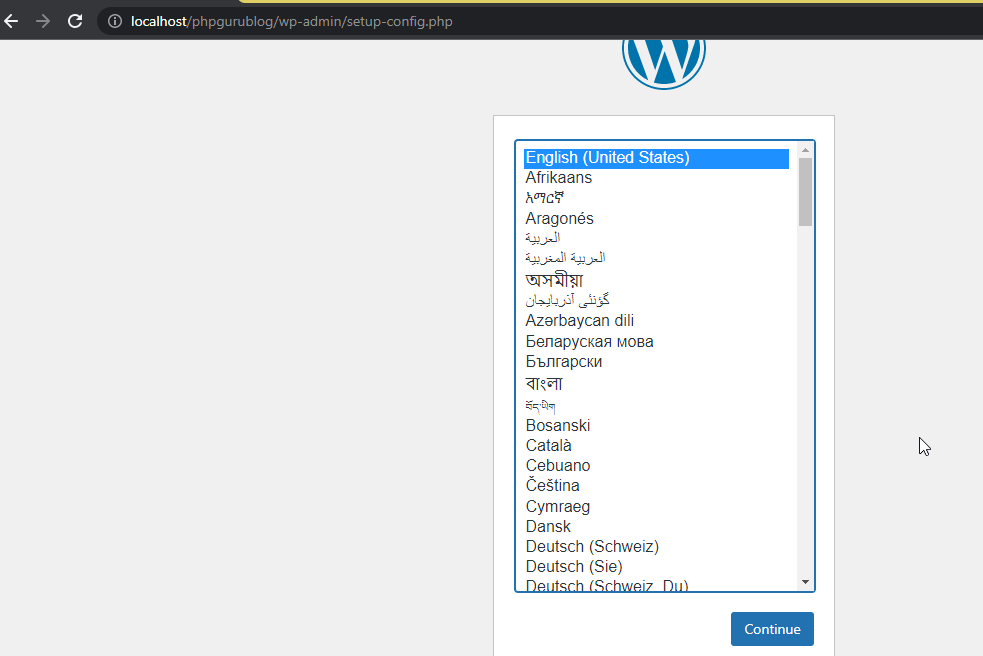
Select the preferred language and click on continue
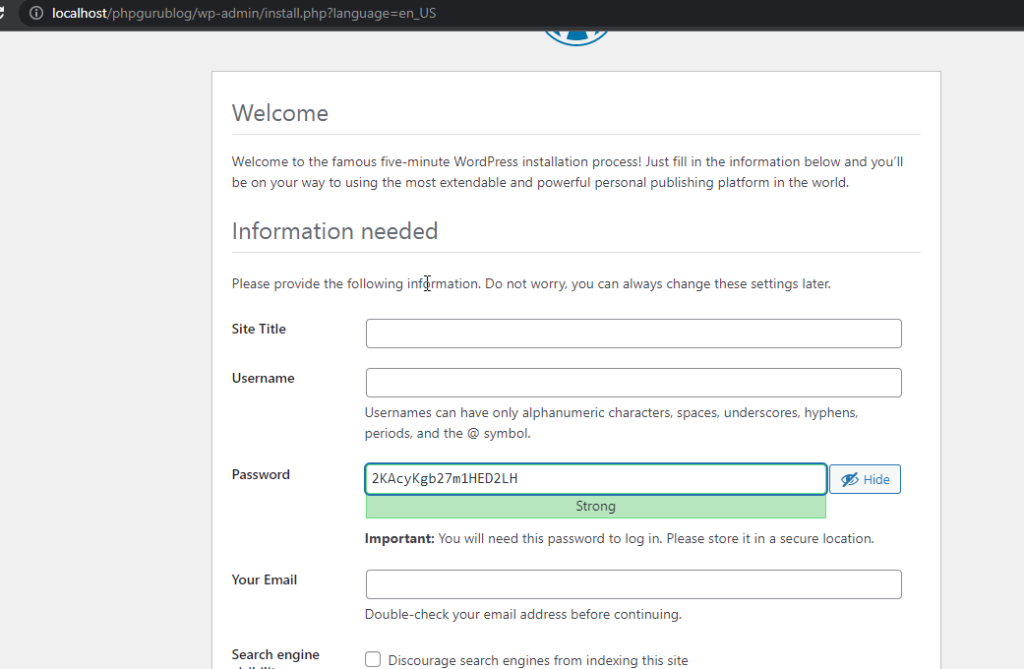
Enter database name as wordpress_stage_installation,the database host will be the host for your database.Here for local I have entered it as root .The database password should be the password for your database host .I have kept it as blank as this is the password for my local setup.Click on submit now.
See the screenshot below:

After the details are entered you can see the below screen.

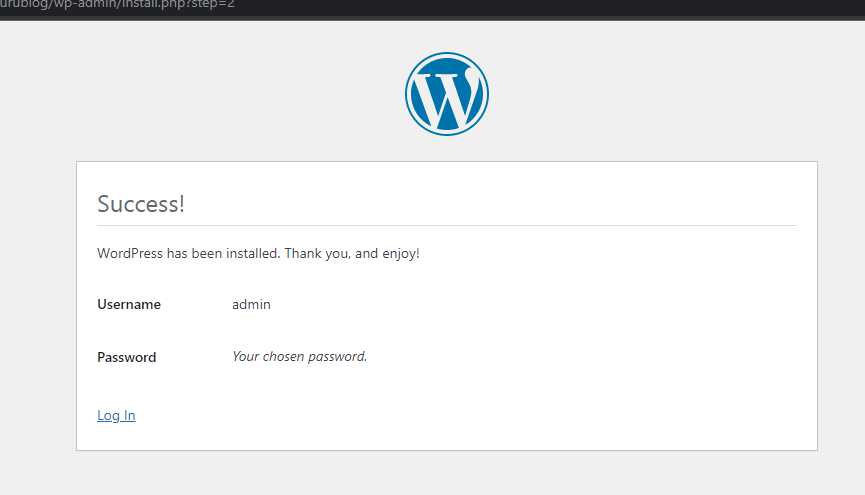
Click on run the installation button.Software will be installed and you can see below information screen
Enter details and click on Install WordPress button.You will get the success installation screen as below:
Step 5: Access the local installation
After successful installation of wordpress now you need to access the local installation
To access admin area navigate to http://localhost/phpgurublog/wp-admin in your local browser .Enter details and then you will be able to login in admin area
To access the frontend you need to access http://localhost/phpgurublog
See the frontend are below

Congratulations ! You have successfully installed wordpress locally using XAMPP.You can explore wordpress now .You donot need internet connection for this .You can create themes and plugins and go through all features thoroughly.You can customize wordpress as per your need and experiment new tweaks and functionality in it.